Win32 Reverse Engineering Tutorial 1 Continued
Prerequisites :
– Assembly (at least the basics)
– Programming background (at least the basics)
Tools needed :
– ollydbg (download here)
Files :
–
ReTutorial1.exe (449 downloads )
(virustotal here) (sha1 : 3e9bb52e42550e9f180877ef861864d49d0f499d)
note: the file for this tutorial as the earlier part
At the end of this tutorial, you should be able to/have
1. Analyze assembly code and program flow/logic
2. Analyze program flow/logic and make simple modifications
3. Brief interactions with ollydbg software
In the earlier part of tutorial 1, you should have been able to get or ‘crack’ the password of the program by looking at the strings through ollydbg. Now, we will attempt to achieve the same result but with a different method (not using the password)
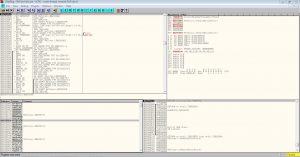
Lets get going. Load up the same .exe into ollydbg and you will see a screen similar to the one below

Like we have done in the earlier part of this tutorial, lets search for all referenced string again (refer back to previous post if you don’t know how).
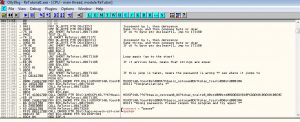
Click on the string that says niraeth-retutorial1 which is the password and you will be bring to a screen like this

Now, we will have to analyze the assembly codes to see how or what we should modify in order to get the Congratulations ! message
We know that a string comparison is being done in the code, but do you know how a string comparison is usually done internally? Take a look at a common implementation of the strcmp below.
int strcmp(const char* s1, const char* s2)
{
    while(*s1 && (*s1 == *s2))
    {
        s1++;
        s2++;
    }
    return *(const unsigned char*)s1 - *(const unsigned char*)s2;
}
The main thing to take note is the *s1 == *s2 and s1++; s2++; . In any kind of comparison, there will always be some sort of comparison operator (== in this case) and a increment or decrement. So as we look at the assembly codes, we will want to keep a watch for the 2 things i have mentioned above. Note that sometimes, the generated code may be different what you expect it to be due to optimizations by the compiler. However, some, if not most part of it should be the same.
If you look at the right column of the assembly codes, you will see some comments i have left there to help you understand better as you read this tutorial.

Take sometime to try and understand the assembly codes and use my comments if necessary. How similar does it look to the strcmp implementation given above? If you wish to take it a step further, try to convert the assembly code into a high-level programming language like C !
Now, i will take some time to explain my thought process as i look at the assembly codes.
Firstly, notice that there are two set of commands that are extremely similar. It starts with a mov, then a cmp, then a jnz . This most likely means that the jnz must be a jump taken when the strings are NOT equal. Why do I say so? Because the loop can only end when
1. String is not equal
2.We reached the end of the string( loop index==strlen(string)+1)
So if the bytes compared were equal, there probably isn’t a need to jump out. The loop should continue on till we detect that we reached the end of the string. Now if you recall how the cmp and jnz operands work, it will be like this
cmp dl, BYTE PTR DS:[ECX] // if dl == byte ptr ds:[ecx], set ZF flag=1
jnz <address>             // jump if ZF is NOT set(when ZF=0)
Now you can take some time to understand or analyze the other minor details of the code, but if you wish to have a reference, refer to my explanation below (the address are based on the image above)
0x00171160:                 // start of loop
  // if( *s1 != s2 )
  // goto 0x00171180;
  MOV DL, BYTE PTR DS:[ECX]
  CMP DL, BYTE PTR DS:[EAX]
  JNZ SHORT ReTutori.00171180

  // if( *s1 == '\0' )
  // goto 0x0017117C;
  TEST DL, DL
  JE SHORT ReTutori.0017117C

  // if( *(s1+1) != *(s2+1) )
  // goto 0x00171180
  MOV DL, BYTE PTR DS:[ECX+1]
  CMP DL, BYTE PTR DS:[EAX+1]
  JNZ SHORT ReTutori.00171180

  // s1 += 2;
  // s2 += 2;
  ADD ECX,2
  ADD EAX,2

  // if ( *s1 != '\0' )
  // continue;                // loop again
  TEST DL, DL
  JNZ SHORT ReTutori.00171160

  // if code reaches here, it means strings are equal
  // return 0;
0x0017117C:
  XOR EAX, EAX
  JMP SHORT ReTutori.00171185 // goes to the congratulations message

0x00171180:
  // if code reaches here, it means strings are not equal.
  SBB EAX, EAX
  OR EAX, 1
  TEST EAX, EAX
  JNZ SHORT ReTutori.001711AC // goes further down to 'Wrong Message!'
Now if you look at the code above, at the end, the address 0x00171180, it shows that the jnz jumps to a code which outputs the ‘Wrong Message !…’. This means that we definitely do not want our code to be jumping there. To prevent it from jumping there, right click the line that jnz is on, click on ‘Binary’ -> ‘Fill with NOPs’ . Refer to the image below if necessary

After you do so, the line that jnz is on should now change to look like this

Now, lets run the program and see if its working as expected. Click on the blue arrow icon at the top menu bar of ollydbg as shown below

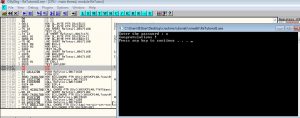
And… you will see that the program outputs Congratulations !

CONCLUSION
With this part of the tutorial, you have experienced doing simple analysis on assembly codes with the help of cross referencing the same implementation in a higher level language (strcmp implementation) and do some manipulation to how the program branches (nop-ing the jnz line).
Be First to Comment