Win32 Reverse Engineering Tutorial 1
Prerequisites :
– Programming background (at least the basics)
Tools needed :
– ollydbg (download here)
Files :
–
ReTutorial1.exe (449 downloads )
(virustotal here) (sha1 : 3e9bb52e42550e9f180877ef861864d49d0f499d)
At the end of this tutorial, you should be able to/have
1. Analyze program flow and logic from important strings in the program
2. Brief interactions with ollydbg
After you have downloaded the executable file, lets get started !
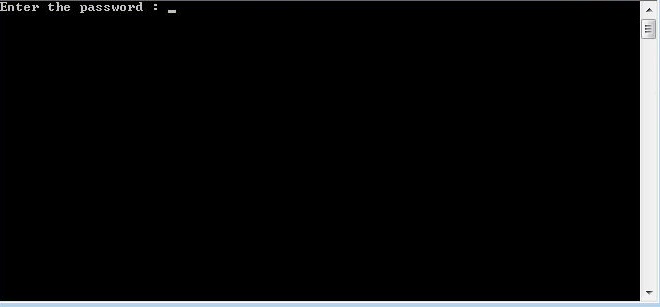
Run the .exe and a console like the one below will pop out.

When they ask you for a password, enter anything – you probably won’t get it right. You should then see an output as shown below

Lets stop and think of how the program logic would look like in code. This will help us better understand the logic, and hence be able to manipulate it to our advantage.
If ( password == "some password" )
    // some code, but we have yet seen what happens when we get the
    // password right
Else
    Print "Wrong password. Please reopen the program and try again !"
Now, if I would to ask you how do we get whatever is in the ‘if’ statement to execute, you will probably say – get the right password. This is one of the way to achieve what we want, but not the only way. You will understand why later on in the tutorials. For now, we will try to get the right password.
Now that we have an idea of how the flow of the program goes, lets open up ollydbg. After opening it, we want to ensure that the debugged program breaks at the entry point of the program. In this tutorial, this setting doesn’t affect anything but it might in the future, so leave the settings as it is. To do so, at the top bar, click Options->Debugging Options->Events tab. Now select the third option ‘WinMain (if location is known)’
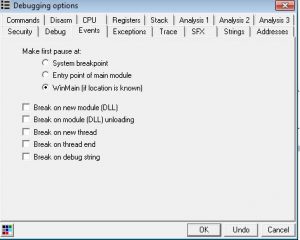
Press OK to save.
Now, lets debug the program using ollydbg.
Drag and drop the .exe into ollydbg or open the file in ollydbg. After everything is loaded, it should look like this

Now right click anywhere in the top left box(where the assembly code is) and click ‘Search For’ -> All Referenced Strings . A window like this should pop out

Now, double click the line or string that says ‘Enter the password’. The window with assembly codes should come back into focus but with a highlighted line as shown below

If we just take a look at the right-most column, we can see 4 crucial strings. “Enter the password “, “niraeth-retutorial1”, “Congratulations !”, “Wrong password. Please reopen the program and try again !”. So it is quite obvious that the password must be “niraeth-retutorial1” .
At the top bar, there is a blue right arrow icon. Click on it to continue running or executing the program. Turn back to the console window and it will ask you to enter the password

Try entering the password now. You will get a message saying “Congratulations !”

CONCLUSION
With this part of the tutorial, you have seen how easy it is to gain crucial information from the strings that are not encrypted or hidden in the program. These strings allow you to make smart guesses about how the program flows and functions. Of course, like I said earlier, this is not the only way to get the “Congratulations !” message. You may wish to have a break first before continuing to the second part of tutorial 1 where you will see a different method employed to achieve the same result.
Be First to Comment